

Supplies Needed:
Tube of choice
Font of choice
MuRa’s Meister Copies
AAA Foto Frame
Mask of choice
I used artwork by Zlata M and an Exclusive tube both can be found at Pics For Design.
Let’s get started:
Open 600×250 canvas
Flood Fill with color from your tube and Add Noise with the following settings.
Settings:
Uniform
Noise 25%
Monochrome checked.
Copy & Paste your tube. Resize making sure that you get the eyes and mouth of the tube.
Duplicate the tube.
On the original apply MuRa’s Meister Copies with the following settings.

Settings:
Wall Paper (rotate) Default Settings
Number: 20
Shift X: 50
Shift Y: 50
Angle: 0
Rotation: 100
Phase: 0
Cycle: 100
Attenuation: 0
Scale: 100
Thru BG Range: 0
Thru BG Smooth: 30
Fade Out: 0
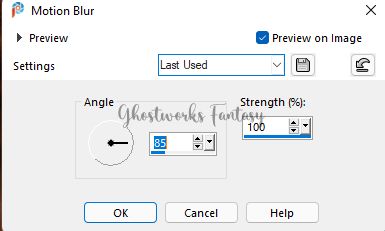
Use Motion Blur with the following settings.
Settings:
Angle 85
Strength 100%
Do this twice.
Apply Distortion Wind twice with the following settings.
From Right
Wind Strength: 100
Edge Effects Enhance
Apply Distortion Polar Coordinates with the following settings.
Polar to rectangular
Edge Mode no choice.
Back to the duplicate of your tube. Set to Blend Mode to Soft Light.
Merge Down
Apply Mask
Copy and Paste your tube again.
Resize smaller (see my tag as an example).
Duplicate and Mirror the duplicate.
Apply Drop Shadow to both with the following (or whatever you like).

Vertical: 2
Horizontal: 4
Opacity: 100
Blur: 7
Color: Black
Shadow on new layer not checked.
Add Border Symmetric checked, Size 1, color to match your tag.
AAA FotoFrame with the following settings

Change Width to 10 and Matte to 2. All the rest stay the same.
Add your credits and name.

